Each ticket created in the events section must be configured according to your association’s business rules to ensure correct pricing for members.
Follow the steps below to set up Member Pricing for tickets:
Configuring Member Prices During Ticket Creation #
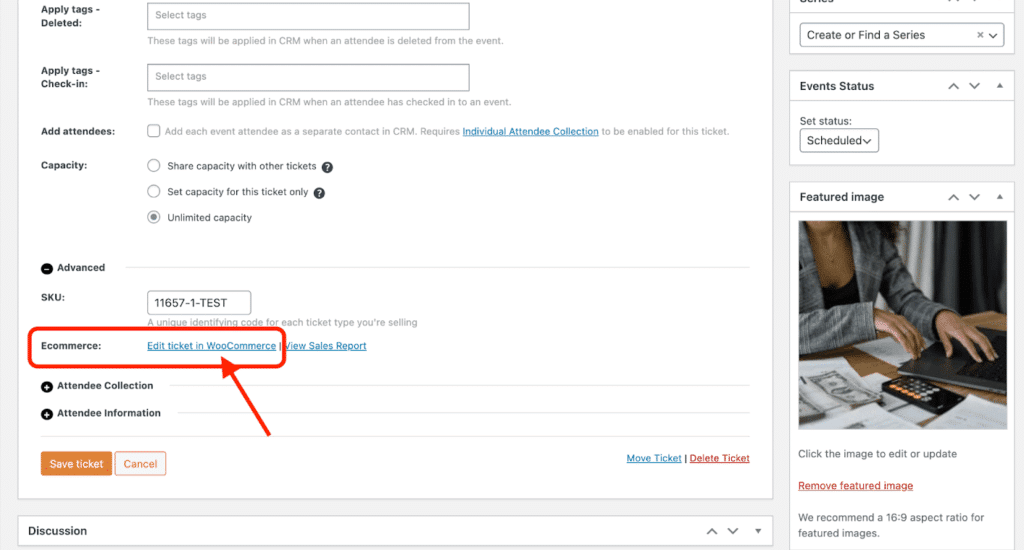
- While creating or editing a ticket, click on ‘Edit ticket in WooCommerce’ found under the ‘Advanced’ settings.

Alternatively, Configure Existing Tickets via Product Management #
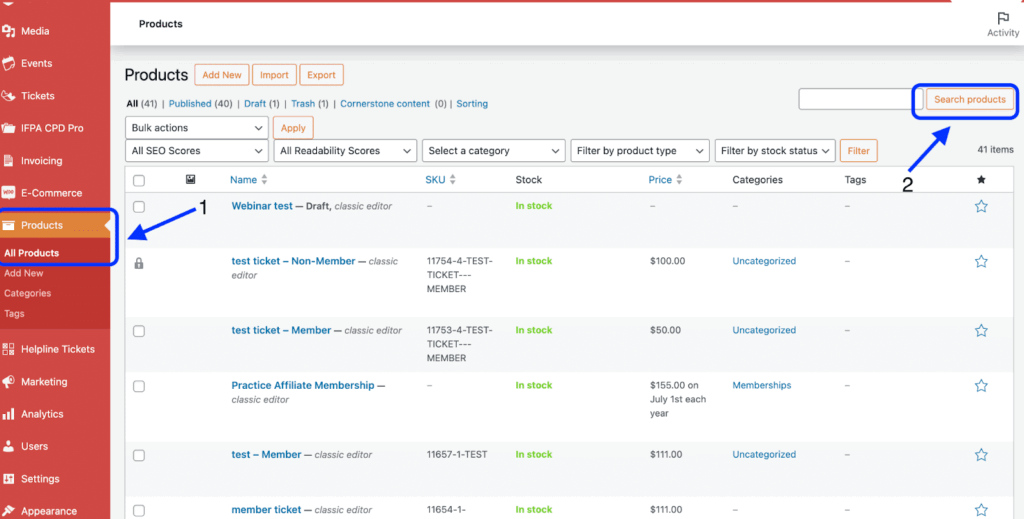
- From the WordPress dashboard, navigate to Products > All Products.
- Use the search bar on the right to locate the ticket you wish to configure.
- Select the ticket to open its product page, then scroll down to the Membership section.
- In the Membership section, under Restrict Content, click Add New Rule.
- Under the Plan dropdown, select all membership tiers eligible to purchase this ticket at the member price.
- In the Only members can dropdown, select Purchase.
- Finally, scroll back to the top right and click Update under the Publish box to save your changes.

Important Notes #
- This configuration must be applied to all event tickets that have member pricing.
- Tickets without member pricing are available to all visitors by default.
- Ensure these rules align with your membership tiers and pricing policies.


